
This article explains how to add a new Nebula user of any supported type; Local, Azure SSO, or Okta SSO.
1. Log in to the Nebula UI, and click on User Management:

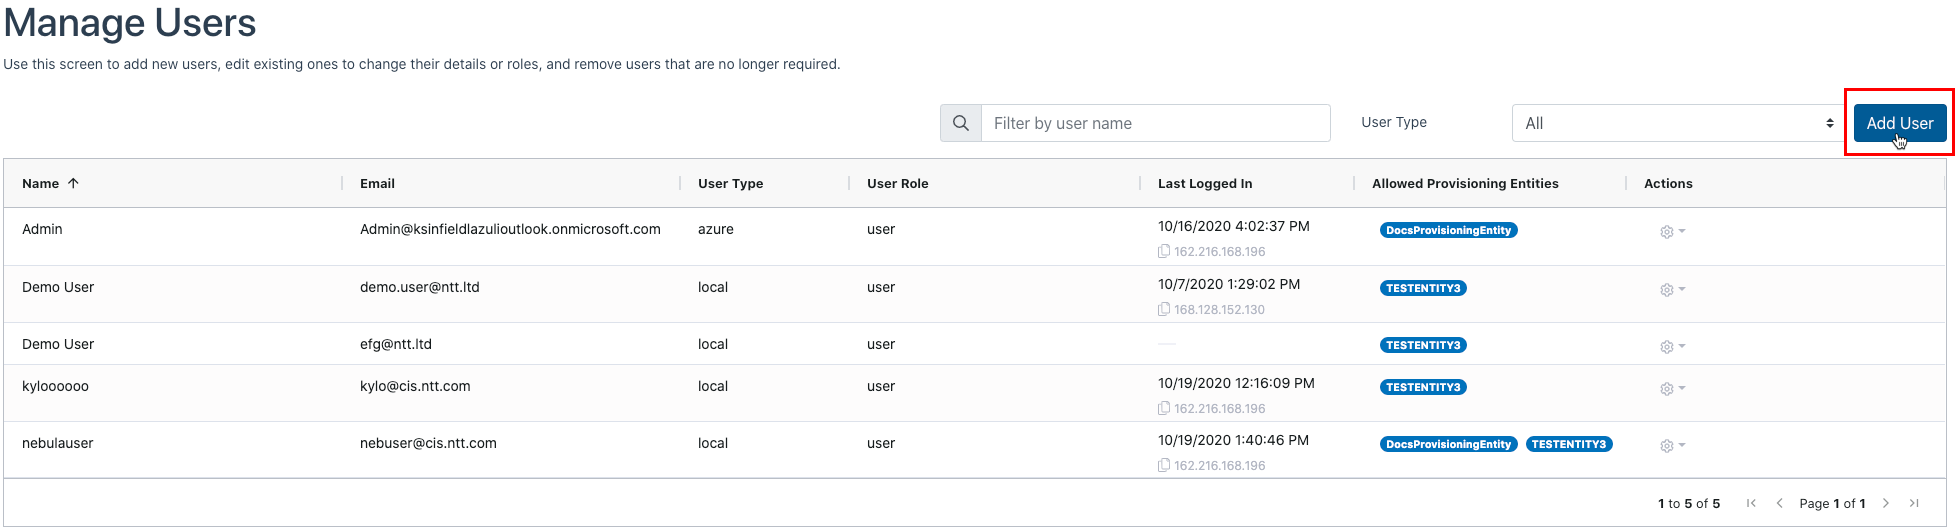
2. You will be directed to the User Management screen. Click the Add User button:
3. The Add User dialog will be displayed. Fill in the dialog with the desired information:
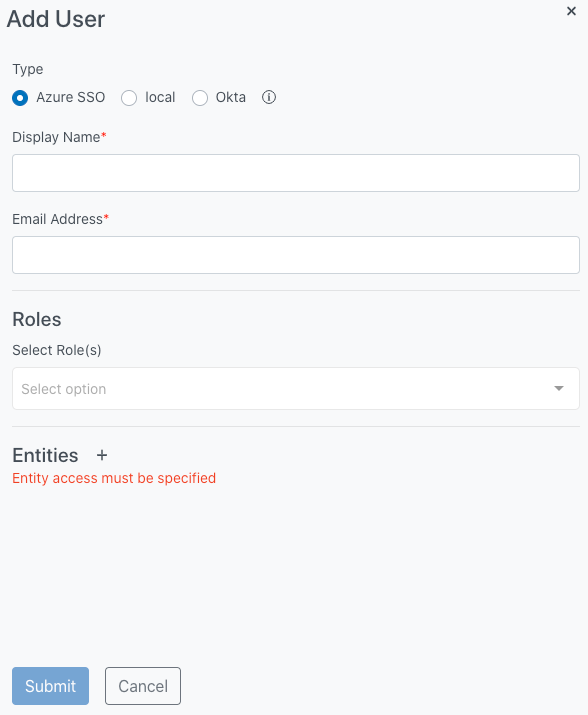
- Type: Select the type of user from the following choices:
- Azure SSO: This type of user must be tied to an Azure SSO. Please ensure that your email address domain is one of: global.ntt or cis.ntt.com. If you select this type, the Password field will disappear.
- Local: This type of user is not tied to an Azure SSO. If you select this type, the dialog will expand to present the required Password and Confirm Password fields.
- Password and Confirm Password fields are explained below
- Okta SSO: This type of user must be tied to an Okta SSO. Please ensure that your email address domain is: global.ntt. If you select this type, the Password field will disappear.
- Note: All User types may not be available to be selected, depending on the Tenant. If a User type is not available, it will be visible, but you will be unable to select it.
- Display Name: The Display Name is the name which is displayed for the User
- Email Address: The email address associated with the User. Used for logging in to the system
- Password: Enter a complex password – Only visible if the user you are creating is “Local”
- Note: The Password must be between 8-50 characters and must contain a combination of uppercase letters, lowercase letters, at least one digit, and at least one symbol
- Confirm Password: Only visible if the user you are creating is “Local”. You must enter the password exactly as you did above.
- Roles: Select the Roles which the new User will have from the drop-down menu:
- User: User can view, add, edit, delete other users, and grant any role privilege available. As such, we suggest assigning this role only as needed.
- User_readonly: User can only view users
- Organizations: User can view, add, edit, and delete Organizations as well as provision services
- Organizations_readonly: User can only view Organizations and associated services
- Reports_readonly: User can download reports and view Organizations and associated services
- User: User can view, add, edit, delete other users, and grant any role privilege available. As such, we suggest assigning this role only as needed.
- Entities: Select which Entities the User will have access to view and manage. You may select more than one:
- Ticking the Allow User access to all entities tick box will allow the user to access all Provisioning Entities

4. Once you have filled out the form, click Submit:

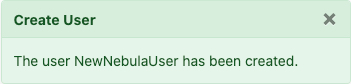
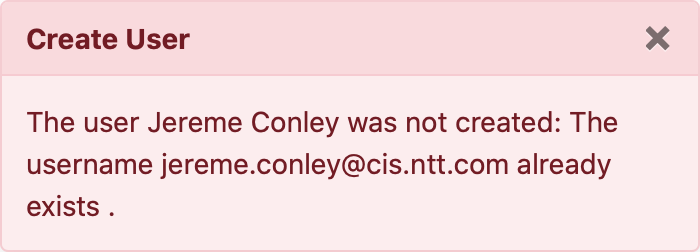
5. The UI will display a message indicating that the new user was successfully created:
 If that is the case, you can associate the user with a Provisioning Entity by following the directions here:
6. The new user will be displayed in the User list:
