
This article describes how to view the Secure Connect Tenants currently provisioned to an Organization and how to provision a new Secure Connect Tenant. Users must have the Organizations role to perform this action.
1. Log in to the Nebula UI and click on the Organizations button:

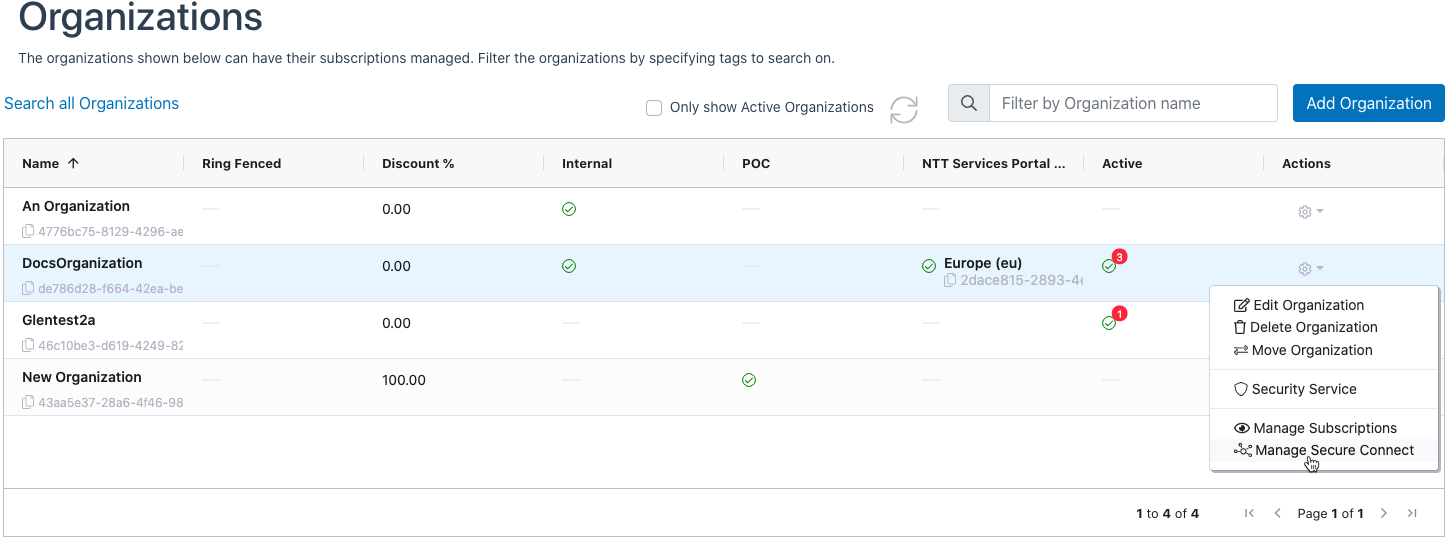
2. The Organizations page will be displayed. Locate the Organization where you want to add a Secure Connect Tenant. Click on the cog in the Actions column, and select “Manage Secure Connect”:
3. The “Manage Secure Connect for Organization” page will be displayed along with a view of any Secure Connect Tenants currently assigned to the Organization with information as described below:
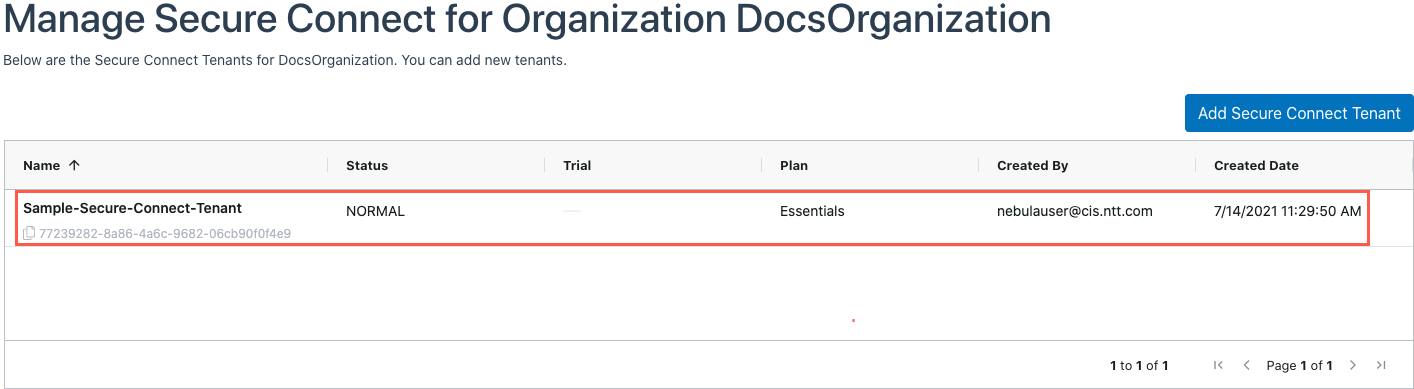
- Name – Name of the Secure Connect Tenant
- Note: You can copy the Secure Connect Tenant ID by clicking the copy icon:

- Note: You can copy the Secure Connect Tenant ID by clicking the copy icon:
- Status – Status of the Secure Connect Tenant. Can be one of:
- PENDING – Secure Connect Tenant is in the process of being provisioned
- FAILED – Secure Connect Tenant failed the provisioning process. Please contact support for assistance.
- NORMAL – Secure Connect Tenant has been successfully provisioned and is in a fully active state.
- SUSPENDED and CANCELLED – For details on these states, see How do I Suspend, Re-Enable or Cancel a Secure Connect Tenant?
- Trial – If the Secure Connect Tenant is part of a trial, there will be a green checkmark in this column
- Plan – The Secure Connect Tenant plan. All newly provisioned Tenants start on the Essentials plan. The Operator can upgrade their plan in the Secure Connect portal.
- Created By – The email address of whoever created the Secure Connect Tenant
- Created Date – The date on which the Secure Connect Tenant was created
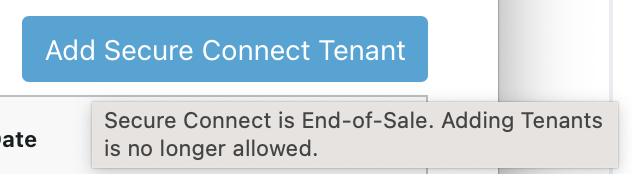
4. Given the End-of-Sale noted above, the Add Secure Connect Tenant button is disabled and will show a tooltip if it is hovered over:
5. As noted above, existing Secure Connect clients may have additional Tenants added via Support Case with approval. The information required in the support case is:
- TenantName – The Name of the Secure Connect Tenant. The Tenant Name will become part of the VPN URL as described in https://docs.cloud-vpn.net/en/network/vpn-access. Required.
- Note: The Suggested Name will be auto-populated in the Tenant Name field with a name suggestion that is derived from the Organization Name and has any disallowed characters removed. You can overwrite the suggestion with something of your choosing.
- Note: The Tenant Name can only contain alphanumeric characters or dashes and its length must be between 4 and 32 characters. If you use the Suggested Name as noted above, and the length is greater than 32 characters, you will have to shorten the name.
- Operator First Name – The user’s first name. Required.
- Operator Last Name – The user’s last name. Required.
- Operator Email – The user’s email address. Required.
- Operator Phone Number – The user’s phone number. Must be a valid phone number, but is not required