This article explains how to view and manage the Azure Subscription(s) that are allocated to an Organization.
How to View an Organization’s Azure Subscriptions
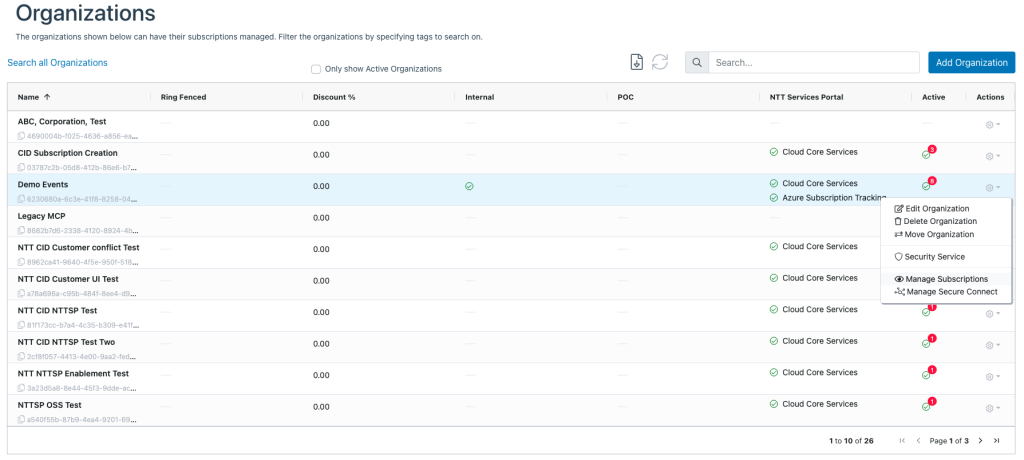
1. Log in to the Nebula UI and click on the Organizations button:

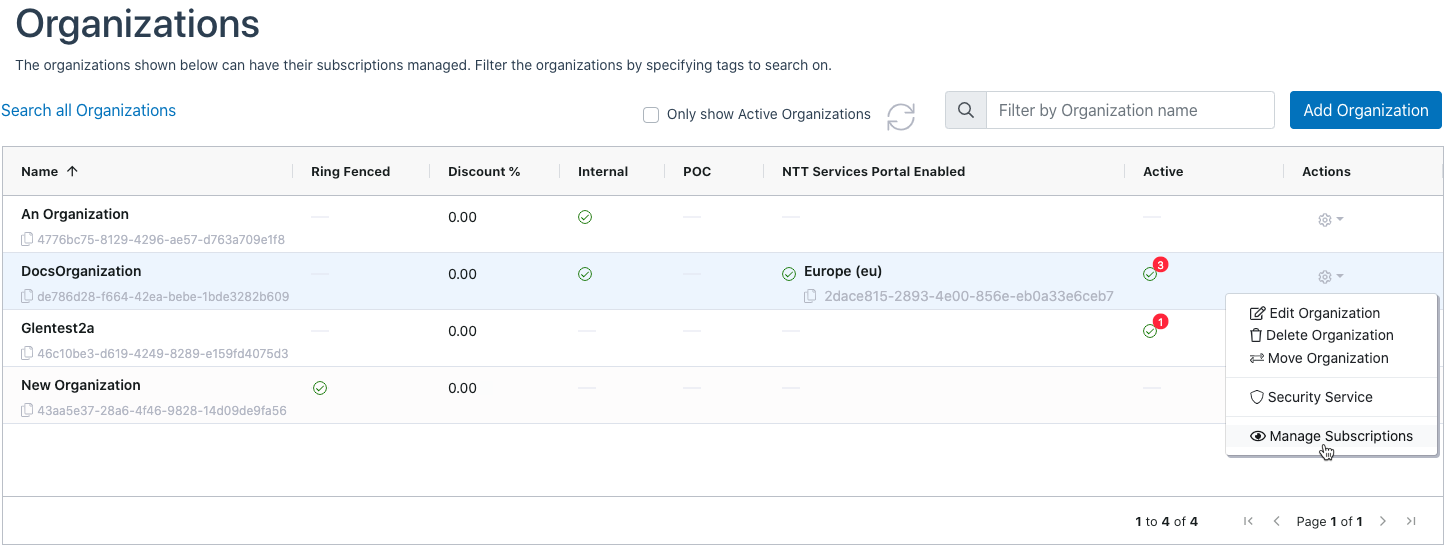
2. The Organizations page will be displayed. Locate the Organization for which you would like to view the Subscriptions. Click on the cog in the Actions column, and select “Manage Subscriptions”:
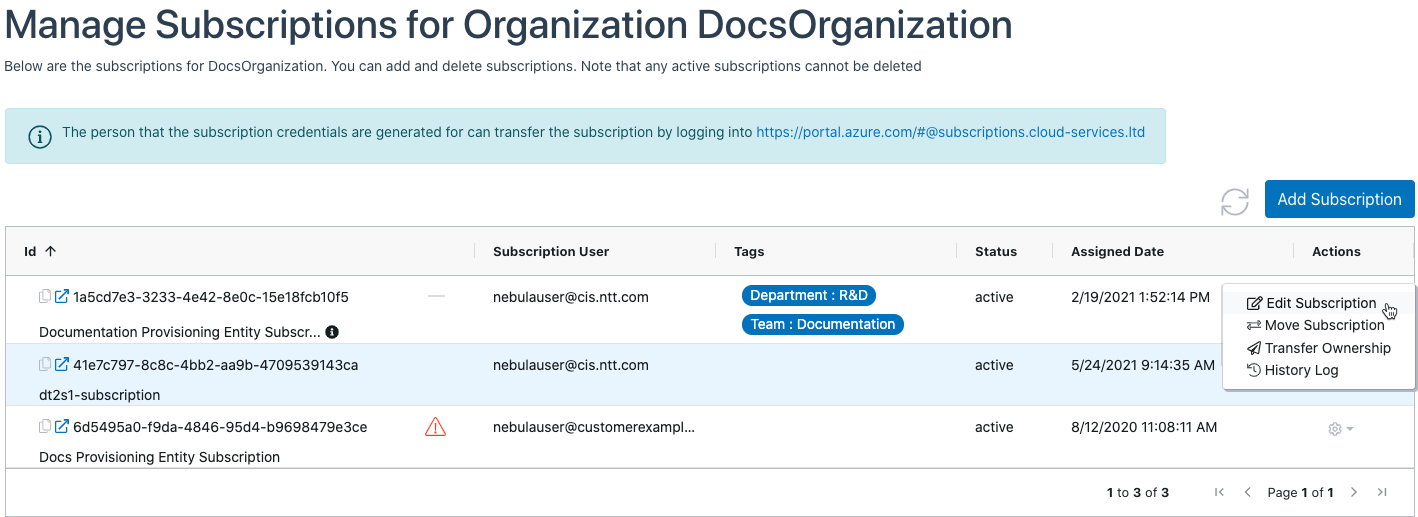
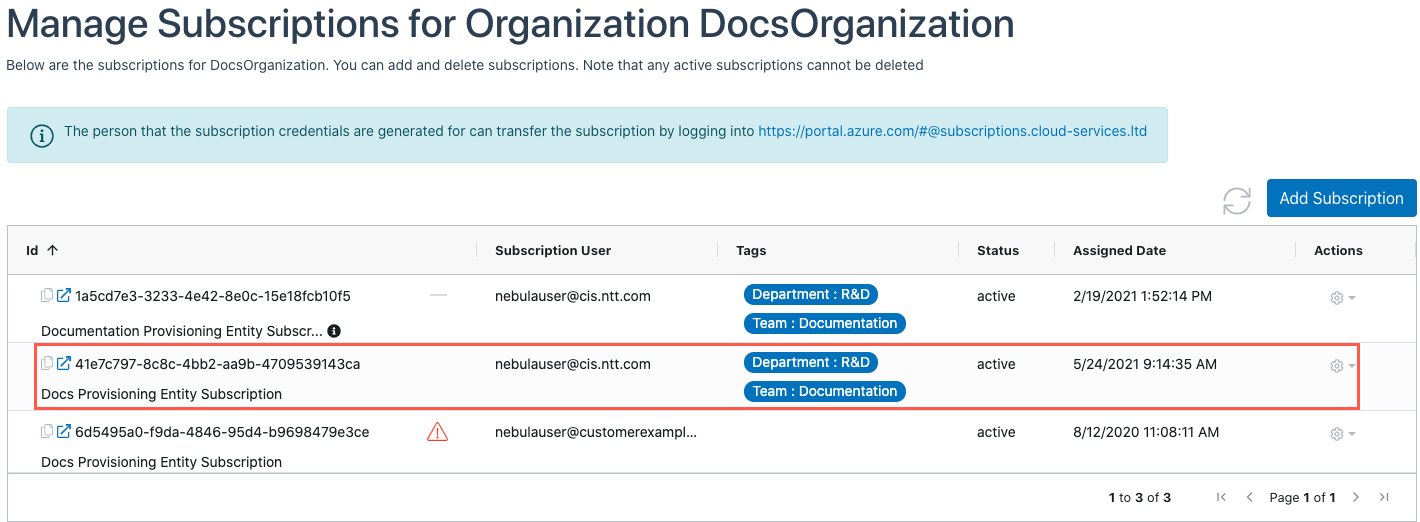
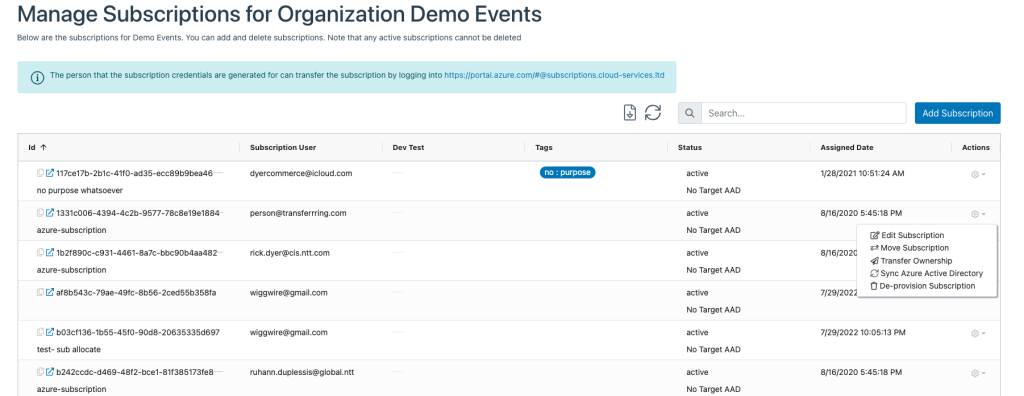
3. The Manage Subscriptions dialog will be displayed with a list of all of the Organization’s Azure Subscriptions:
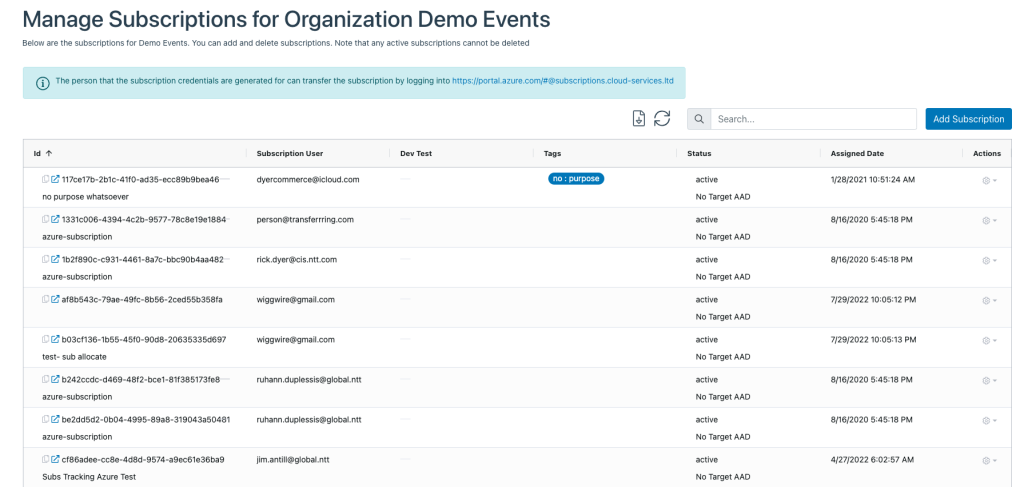
- ID – The ID column displays the Subscription ID and Description.
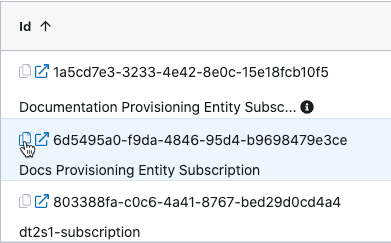
- You can copy the Subscription ID by clicking the ‘Copy ID’ icon:

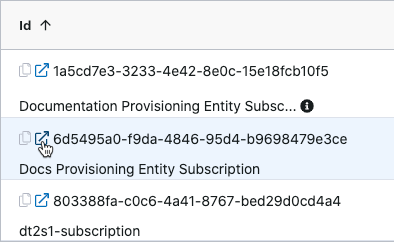
- Clicking the ‘Popout’ icon will open the Azure portal to the Subscriptions page

- The grey dash indicates that there is no Subscription History available

- A red triangle with an exclamation point inside indicates that the last operation that was performed against the subscription failed

- You can copy the Subscription ID by clicking the ‘Copy ID’ icon:
- Subscription User – This column indicates the email address associated with the user who was given rights to transfer the Subscription to the Target AAD when the Subscription was provisioned.
- Dev Test – If this column is checked, the Subscription is a Dev/Test subscription.
- Tags – This column displays any Nebula Tags that are associated with the Subscription. Nebula tags are metadata that can be added when the Subscription is provisioned, or you can edit the Nebula tags as described in the “How to Manage Subscription Metadata” section below
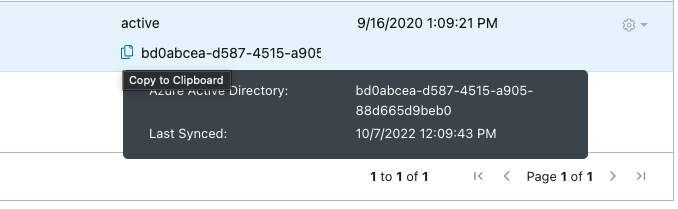
- Status – This column indicates the status of the Subscription where “active” means it has been transferred to a Target AAD. The system will also show the ID of Target AAD last known to be associated with the Subscription.
- If the status reads “No Target AAD”, follow the instructions in the How to Synchronize the Azure Active Directory (AAD) Id for a Subscription section below.
- Assigned Date – This column indicates when the Subscription was provisioned for the Organization
- Actions Menu – This column allows you to take the following actions against the Subscription:
- Edit Subscription – See How to Manage Subscription Metadata section below
- Move Subscription – See How Do I Move a Subscription to a Different Organization?
- Transfer Ownership – See How do I Transfer Ownership of a Subscription?
- History Log – See How do I View Subscription History?
- Sync Azure Active Directory – See How to Synchronize the Azure Active Directory (AAD) Id for a Subscription section below
- De-Provision Subscription – See How to Deprovision an Unused Subscription
4. You can copy a Subscription ID by clicking on the “copy ID” icon:
The UI will display a message indicating that ID was copied successfully:

5. You can click on the “Pop-out” icon and the UI will automatically open a new browser tab that redirects you to the Azure Subscriptions page:
However, we recommend that you navigate to https://portal.azure.com/#@subscriptions.cloud-services.ltd to access the Azure Subscriptions Active Directory Tenant.
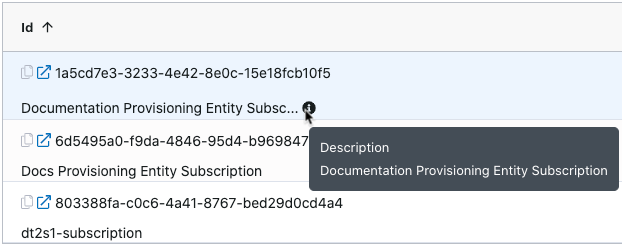
6. If a Subscription’s Description is greater than 40 characters long, the “Information” icon will be displayed. Hovering your mouse over the icon will display the entire description:
7. The data on this view can be exported using the CSV icon – for more details see How to Download the Contents of a Nebula Table as a CSV 
How to Manage “Tag” Subscription Metadata
1. Locate the Subscription for which you want to manage the metadata as described in the “View” section of this article.
2. Once you have located the desired subscription, click on the cog in the Actions menu, and then select Edit Subscription:
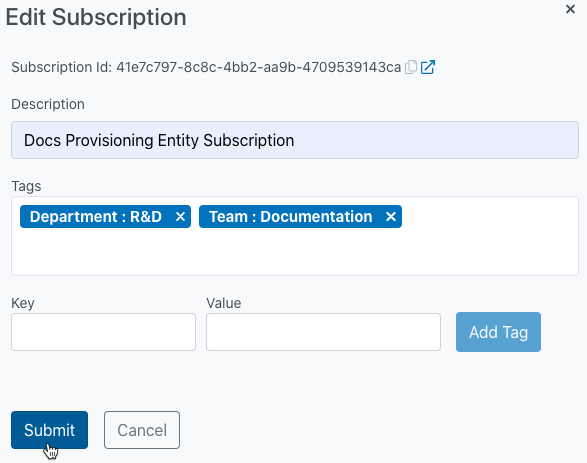
3. The Edit Subscription dialog will be displayed. You can now set various fields of metadata:
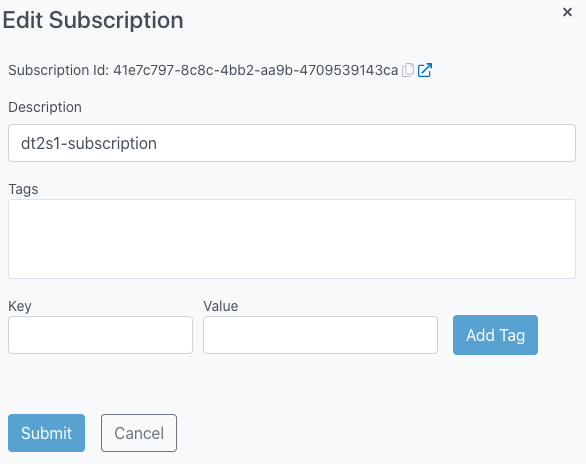
- Description: Allows you to set a text-based way of identifying what the Subscription is used for.
- Can add up to 255 characters
- If the description is longer than 40 characters, it will be truncated, and the ‘information’ icon will be displayed. Hovering your mouse over the icon will display the full description.
- The default Description will be displayed until it is altered using this function.
- If the description is longer than 40 characters, it will be truncated, and the ‘information’ icon will be displayed. Hovering your mouse over the icon will display the full description.
- Can add up to 255 characters
- Tags: Nebula Tags are user-defined Key/Value pairs for identifying what the subscription is used for.
- You create the “Tags” by using the Key and Value boxes, then clicking “Add Tag”. Once created they will appear in the “Tags” dialog
- Key: One portion of a Tag
- Can be from 1-64 characters
- Value: The second portion of a Tag
- Can be from 1-128 characters
4. Fill out the dialog with the desired changes, then click Submit:
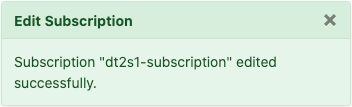
5. The UI will display a message indicating that the operation was successful:
6. The changes will be displayed in the UI:
How to Synchronize the Azure Active Directory (AAD) Id for a Subscription
- From the “Manage Organizations page, use the Action menu to choose “Manage Subscriptions” for the Organization that you wish to see the AAD for.
2. Under the “Status” column you will now see either an AAD id for the subscription, or if the subscriptions has not yet been transferred, you will see “No Target AAD”
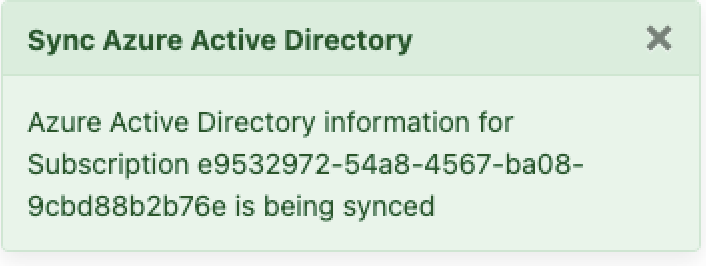
3. Find the Subscription that you wish to synchronize to show the id of the target AAD. Under the Action Menu, choose “Sync Azure Active Directory”
4. You will see a popup that the AAD is being synced:
4. In few seconds, the Managed Subscription dialog will reload and the Id of the AAD will be updated. You can click on the info button to see the full AAD id and when it was last synced.
Note: You will need to refresh the screen after hitting the Sync AAD option.